Enable E-Invoicing via Xilnex Portal
Xilnex Portal is the central platform where all configurations and settings for your system can be managed. Designed for flexibility and ease of use, the portal allows you to set up, monitor, and maintain various aspects of your business operations in one place. Through the Xilnex Portal, you can configure user roles and permissions, configure e-invoicing settings, manage documents and update company details.
To access to E-Invoice Module
E-Invoice module can be access thru the [Integration] feature on the top right – Kebab Menu icon and then select the [MALAYSIA LHDN E-Invoice].

A Superadmin account is required to enable the e-invoicing module in Xilnex. If you are not logged in as a Superadmin, you will be prompted to enter Superadmin credentials for confirmation. Please note that once e-invoicing is enabled, it cannot be disabled. However, alternative methods are available to stop e-invoicing services if needed.
Sandbox and Production Environment
The Malaysia e-invoicing page can be found under Integration. If the e-invoicing module is not enabled, the button will appear in red with an INACTIVE status. Clicking the button will activate the e-invoicing module and set the environment to ACTIVE IN STAGING. Clicking it again will switch the environment to ACTIVE IN PRODUCTION.

WARNING: Environment changes are permanent and cannot be reverted. Once the e-invoicing module is enabled, it cannot be disabled. Similarly, once the environment is switched to Production, it cannot be reverted to Staging. This restriction is in place to prevent potential issues.
Profile Setup
There are two categories for setting up the profile: General Settings (also referred to as Global Settings) and store-specific settings (also referred to as Store Profile Settings).
- General Settings (Global Settings) – These settings setup apply to the whole company, covering all stores under one setup.
- Store Profile Settings – These settings are setup specific to each individual store, allowing you to customize settings store by store.
General Profile (by Company)
General Profile Settings apply to the whole company. All stores will follow the same setup, making it easier to manage everything in one place.
Consolidated E-Invoice Posting Schedule
- Schedule a posting period - This setup allows you to schedule the automated submission of your consolidated sales data to LHDN (Lembaga Hasil Dalam Negeri Malaysia) on a scheduled date, without needing to do it manually.
- Submission Window - Although the government allows E-Invoice submissions from the 1st to the 7th of each month, Xilnex only allows the [Monthly Cut Off] to be set between the 2nd and 6th. This buffer helps reduce issues from last-minute changes or network delays, ensuring smoother and timely submission.
- It generates one document for each store by date, ensuring that sales data from different stores is properly organized and submitted separately based on each store’s activity.SETTING NAMEDESCRIPTIONRECOMMENDATIONOn/Off ToggleToggling the radio button enables or disables the scheduler for posting E-Invoices to the consolidated invoice. If disabled, the consolidated E-Invoice requires generated manuallyEnableMonthly Cut OffDay when the Consolidated E-Invoice is automatically generated and posted.This refers to the designated date on which the system finalizes and submits all sales data from the previous month to LHDN Malaysia.Min: 02, Max: 06AnyRepeat every(day)Number of days to repeat the sales consolidation and posting process. The shorter value means the process will repeat more frequently.Min: 01, Max: 14Leave blank to disable daily posting.Data buffer(days)Number of days allowed for data modification and for buyers to claim their Individual E-Invoices before the next scheduled posting date.Min: 01, Max: 07Leave blank to disable daily posting.Preview DateAfter selecting the dates and settings above, use this option to view a visual illustration of when the data will be posted.N/A

Tips
- Use the Preview Date button to simulate and review how the scheduler will run.
- Typically, leave "Repeat" and "Data Buffer" blank and only select the Monthly Cutoff option. These additional fields are available for users who wish to submit Consolidated E-Invoices on a daily basis, though this approach comes with certain limitations.
- On the selected monthly cutoff date, the scheduler will only consolidate transactions from the previous calendar month. For example: If the cutoff date is set to 3, then on 3rd February, the scheduler will consolidate transactions from 1st January to 31st January.
- The scheduler runs only once on the cutoff date and is triggered at 00:00.
- This configuration must be set 2 hours before the scheduler runs. If the user fails to catch the train, the user can manually generate it on the e-invoice dashboard.
- Consolidated e-invoices are generated separately for each store and for each date. If the user has 2 stores, a total of 62 consolidated e-invoices will be produced—31 per store, one for each day of the month.
- If the scheduler is not enabled, or the monthly cutoff date is blank, the scheduler will not run.
Self-Billed E-Invoice Posting Schedule
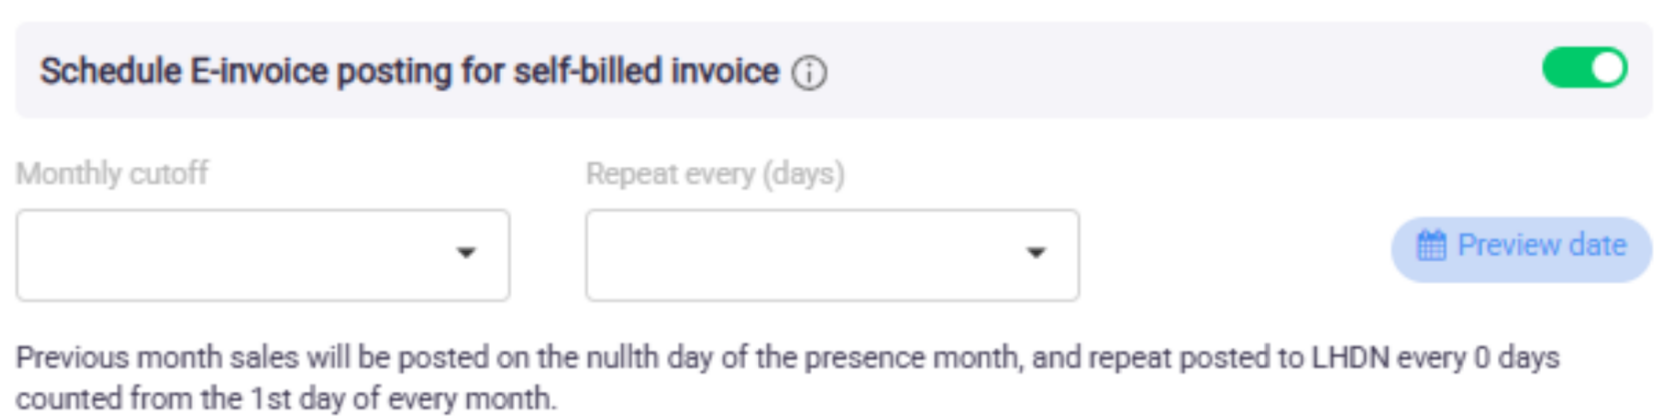
Schedule a posting period
This setup allows you to automate the submission of self-billed invoice data to LHDN (Lembaga Hasil Dalam Negeri Malaysia). This removes the need for manual submission.
The configuration works the same way as the Scheduler in the Consolidated Sales module. It offers automated scheduling and control.
SETTING NAME | DESCRIPTION | RECOMMENDATION |
| On/Off Toggle | Use this option to enable or disable the Self-Billed E-Invoice posting schedule. | Enable |
| Monthly Cut Off | Day when the Self-Billed E-Invoice is automatically generated and posted. This refers to the designated date on which the system finalizes and submits all self-billed e-invoices from the previous month to LHDN Malaysia. Min: 02, Max: 06 | Any |
| Repeat every(day) | Number of days to repeat the sales consolidation and posting process. The shorter value means the process will repeat more frequently. Min: 01, Max: 14 | 1 |
| Preview Date | After selecting the dates and settings above, use this option to view a visual illustration of when the data will be posted. | N/A |
Handling Invalid E-Invoice
E-Invoice Handling Preference (Invalid Status)
The purpose of this setting is to give the user the option to either manage e-invoices with an invalid status manually or allow automation to handle them.

This is important because:
- When a sale gone through TIN Tagging process, it’s treated as an Individual E-Invoice.
- On the other hand, sales without a TIN are grouped together and submitted as a Consolidated E-Invoice.
- If a TIN-tagged sale is submitted and fails (marked as Invalid for any reason), it will not be included in either the Individual group or the Consolidated group. In this case, the sale remains unposted and is not added to the consolidated list.
- If these cases are not handled properly, the affected sales may be excluded from the submission, which can lead to discrepancies between transactions recorded in Xilnex and those submitted to LHDN.
This setting helps you decide if you want to:
- Manually review and fix these Invalid cases, or;
- Let the system reset the invalid submission and repost them under Consolidated E-Invoice automatically.
Exclusion and discrepancy handling | Deferred consolidation (Recommended) |
When this setting is turned on, any e-invoice that has issues (like missing details or submission errors) will be marked as Invalid. It will stay that way until either:
| If this setting is turned on, the system backend will automatically reset and remove all the records with an Invalid status, then consolidate them for e-invoice submission. This means that if a customer submits an E-Invoice and it comes back as Invalid (for example, due to missing info or system errors), the system backend will fix the status and get it ready for posting - no manual action needed. |
Tips: The key question here is: Do you want to manually handle every single invalid e-invoice?
- If Yes, then select Exclusion and Discrepancy Handling.
- If No, then choose Deferred Consolidation (Recommended).
Submit Consolidated E-invoice Based On
Consolidated Submission Date Preference (Sales Date vs Business Date)
This setting allows users to submit their Consolidated E-Invoice based on their preferred date setting — either Sales Date or Business Date — depending on their business flow.
Some businesses operate late into the night or across midnight (like bars or 24-hour stores). In those cases, one business session may cover two different calendar dates. Using Business Date helps group those sales as one session, making your report clearer and more accurate.
Profile Detail
In this section, you are required to configure the following:
- Business owner details
- Assign stores (outlets/locations) under a business owner profile
- Set the e-invoicing effective date
- Choose whether the scheduler should follow the global configuration or have a separate configuration per profile
Business Owner Profile (Supplier)
Business Owner Profile refers to the details of the Xilnex user that will be used when issuing an e-invoice.
For example:
- In Sales, these details will appear as supplier/issuer's information (the party selling goods to customers and receiving payment).
- In GRN, these details will be used as buyer's information (the party purchasing goods from vendors and making payment).
Create a new business owner profile
To create a new business profile, click the green NEW button at the top right. Alternatively, double-clicking an existing profile from the list will also open the form for viewing or editing.
A new form will appear, and users are required to fill in all mandatory fields, which are indicated by a red asterisk (*) next to the field name under the [Profile Detail] section. Please fill in accordingly. If you're unsure about any information, it's recommended to consult your tax agent for accurate input.
FIELD | DESCRIPTION |
Business owner name * | The official registered name of the business or company. |
Business owner's TIN * | Tax Identification Number (TIN) registered with LHDN. |
Identification type * | Select the option that corresponds to the LHDN Taxpayer Profile:”
|
Identification number * | The value entered depends on the selected Identification Type. For example:
|
Business owner SST registration number | This ID is issued by the government upon registration for SST (Sales and Service Tax). Leave blank if not applicable. |
Business owner tourism tax registration number | Tourism Tax Number. Leave blank if not applicable. |
Business owner's email | Email address that receives notifications from Xilnex after each E-Invoice submission. |
Business owner contact number * | Issuer's Contact Number |
Business owner Malaysia standard industrial classification (MSIC) code * | The MSIC code is a number that identifies the type of business activity. It can be found in the SSM registration record or obtained from a tax agent |
Business owner's address * | Issuer's Address |
Postal zone * | Issuer's PostCode |
City name * | Issuer's City |
State * | Issuer's State |
Country * | Issuer's Country |
Store Details
A company (COM ID) may be operated by multiple taxpayers (different business entities), each managing specific outlets. For example:
- Taxpayer A manages 2 outlets
- Taxpayer B manages 3 outlets
- Taxpayer C manages 1 outlet
In this case, create 3 separate business owner profiles and assign the corresponding outlets under each profile to ensure proper ownership and tax reporting. There are three ways to setup the store profiles:
- By Store Ownership (based on the business owner)
- By Individual Store (for specific outlets)
- Or to All Stores (apply the same details to every outlet)
STORE PROFILE TYPE | DESCRIPTION | PROs |
|---|---|---|
Store Ownership | This option lets you set up details for different stores owned by a business owner. Each store will have its unique profile and be linked to a specific business owner. | ✅ New stores are auto-configured for e-invoicing on Xilnex Portal without extra setup. With store ownership set at store management. |
Individual Store | Choose this option to set up a profile for one specific store only. This is helpful when managing just one store or if you want to focus on individual store details separately. | ✅ Ability to create multiple preferred stores under a single profile, each with its own E-Invoicing effective date. |
All Stores | Use this when all stores share the same business registration number or owner. Suitable for centralized E-Invoice issuance. Note: Selecting "All Stores" disables the option to add other profiles. | ✅ Include all stores under one ownership, with the flexibility to define an exclusion list. |
Tips
- The effective date refers to the starting date for Xilnex to issue e-invoices.
- This date determines when e-invoicing applies; only documents created on or after this date will be eligible. Any documents dated before the start date will be excluded from e-invoicing.
- For example, if the date is set as 1st February, all transactions dated before 1st February will not be flagged as "Required E-Invoice".
- In the sales module, the sales date (also known as business date) will be used to compare against the effective date.
- In self-billed documents (GRN module), the invoice date will be used instead — not the receiving date.
Schedule E-Invoice Posting (by Store)
Store Profile Settings are applied at the individual store level. By default, stores follow the General Profile settings.
Exception:
Schedule for Consolidated E-Invoice
Schedule for Self-Billed E-Invoice
These two schedules can be configured at the store level, allowing each outlet to manage its own timing for E-Invoice submission
Related Articles
How to Resolve Invalid E-Invoices in E-Invoicing Dashboard
E-Invoices are validated directly by the LHDN Malaysia server. When a submission is marked as invalid, the server will return an error message (also known as the “Invalid Reason”). Taxpayers are expected to review this message and take corrective ...Enable E-Receipt Portal (Buyer's Portal)
Overview The E-Receipt Portal is a service featured by Xilnex. It allows buyers to submit their purchase details themselves through a public portal, so sellers do not have to collect information during a transaction checkout. Collecting buyer ...Getting Started with Xilnex E-Invoicing
Read Me First Before we begin, please review the following important points: Xilnex product is directly integrated with IRBM's API. Upon complete setup, your document may be submitted to IRBM via the API. All testing should be conducted in the ...How to Stop Xilnex E-Invoicing
Scenarios Requiring Xilnex E-Invoicing Deactivation Deactivate Xilnex E-Invoicing when a business falls below mandatory thresholds or ceases operations, ensuring compliance with IRBM guidelines while avoiding unnecessary module activity. This ...Xilnex E-Invoicing Document Split
Type Descriptions Product Xilnex E-Invoicing New Features E-Invoice Document Splitting Document Splitting Function Type Toggle Configuration E-Invoice Settings Required DB Upgrade No Release Date 13 August 2025 Background When a generated payload ...
Recent Articles
Managing Lark User Email Mapping in Xilnex for Lark
Overview The Users card matches each Xilnex user to their Lark account by email. This is what lets features like Permission Approvals and Document Approvals deliver Lark cards to the right person. This article covers how to review the mapping and fix ...E-Wallet and Credit Card Payment - Recheck Status & Force Complete
This guide walks you through what to do when a payment goes through on the terminal or e-wallet, but Classic POS fails to commit sales. When Does This Happen? During payment, Classic POS will show a "Connecting to Ewallet party..." or processing ...E-Journal for BIR Compliance (Philippines)
Overview The E-Journal feature generates a .txt file that complies with BIR (Bureau of Internal Revenue) requirements in the Philippines. This feature is available only for the Philippines COM. Users from other countries' COMs will not be able to ...Disconnecting or Reconnecting Xilnex for Lark
This article covers how to disable a template, fully disconnect the integration from Lark, and reconnect it again. Disable a Template Turning a base off only stops that one base, everything else keeps syncing, and none of your existing data in Lark ...Creating a Base in Xilnex for Lark
Overview This article walks you through creating a base for a template, giving end users access to it in Lark, and verifying data is syncing correctly. Xilnex for Lark must already be connected before you start. If the Templates card isn't accessible ...
Popular Articles
Basic - How to create a voucher-coupon
Voucher and coupon definition Voucher can be generated in bulk and can be used once Coupon can only be created one at a time (reusable code) and can be use multiple times Pre-voucher / coupon setup There are 2 things need to be prepared before we can ...Understanding DuitNow QR Payment in ClassicPOS
Introduction This document introduces the DuitNow QR payment feature available in the Xilnex Retail POS, enabling merchants to accept payments conveniently through Malaysia's national QR payment standard. The integration of DuitNowQR simplifies the ...Intermediate - How to Configure and Use Approval Settings in Purchase Orders (PO)
1.0 What is approval setting In general, "approval setting" refers to the configuration or process by which a request, action, or change must be reviewed and approved before it proceeds. The term is often used in business, software applications, and ...Buy 2 for Special Price Promotion
Use Case: Stock clearance, seasonal offers, or spotlight products. From the sample screenshot above, this promotion requires 2 items to trigger. If only 1 Milk Tea is added to the sales list, no discount will apply since the condition of 2 items is ...Creating Delivery Type for Sales in Classic POS
How to Create Delivery Type 1. Access to the [System Configuration] 2. Select the [Sales] section 3. In the [All Outlets] tab, look for the 'Delivery Type' 4. Click on the [Configure] In the Delivery Type Setup form: 1. Enter the Delivery Type. 2. ...