Understanding DuitNow QR Payment in ClassicPOS

Understanding DuitNow QR Payment in ClassicPOS

Introduction

This document introduces the DuitNow QR payment feature available in the Xilnex Retail POS, enabling merchants to accept payments conveniently through Malaysia's national QR payment standard.
The integration of DuitNowQR simplifies the payment process for merchants and customers alike—offering faster checkout, reduced cash handling, and broad payment acceptance under a single QR.
This document will help you understand:
  • The transaction flow from QR display to payment confirmation to sales completion
  • Action to be done during fail scenario
  • Operational behavior during online and offline scenarios

Transaction flow in POS

The process flow is applicable for both Retail Point Of Sale and F&B Point Of Sale in Xilnex.
  1. Pay using DuitNowQR

      In order to start the DuitNowQR process flow, press the DuitNowQR payment method during the payment process.
  1. In Retail Point Of Sale


  2. In F&B Point Of Sale


  1. Display of DuitNowQR

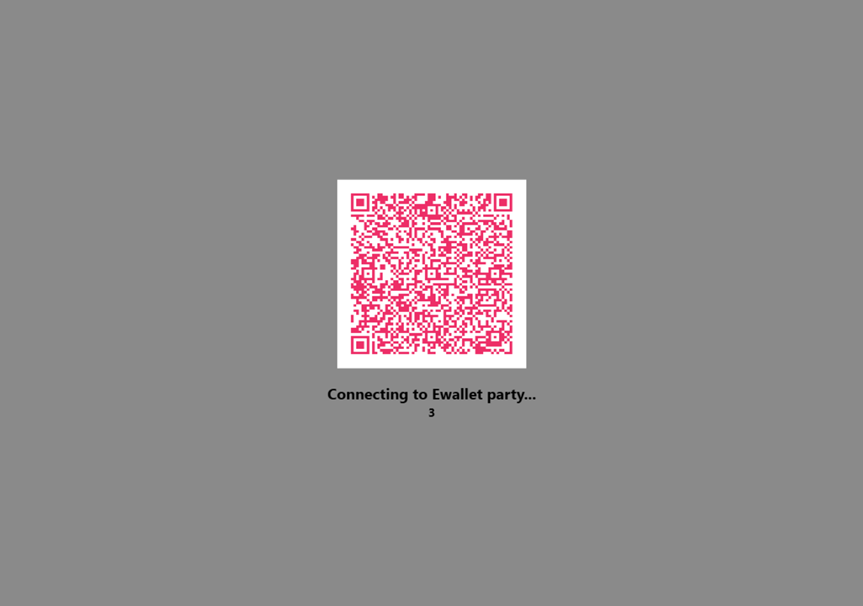
      After pressing the DuitNowQR button, the QR will be displayed on the screen. During this screen, customers can start to scan and make payments.
      

  1. Recheck Status function

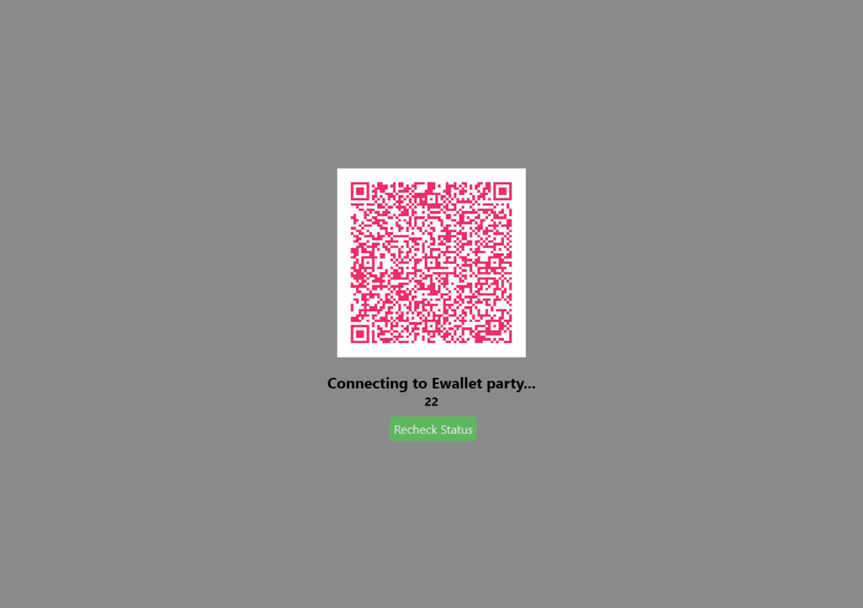
      After processing for 20 seconds, POS will display the Recheck Status button to let user able manual check status instead of waiting for the completion signal.
      

  1. Completion process

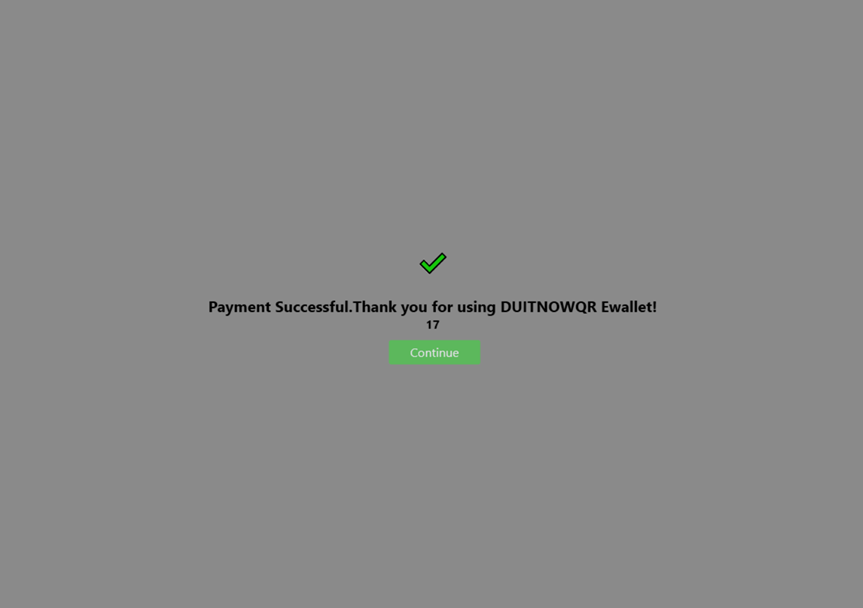
      When receive complete signal from server, Xilnex POS will auto complete the sales and proceed to print receipt.
      

  1. Timeout of the processing

      After 40 seconds of processing time, Xilnex POS will stop displaying the DuitNowQR, but we will remain listening to the signal of completion on the processing screen.
  • Close: cashiers can close the processing screen after 40s of processing time. After the process screen is closed, Xilne POS will be unable to listen to any completion signal from payment gateway.
  • Recheck Status: cashiers are still able to use the button to check the payment status manually.
  • Force Complete: this is the button to let cashiers manually complete the sales without the completion signal.
    • There will be payment remarks as "Force Complete" for reference in payment record.
    • Normally, it is only used when unable to auto complete and customers show payment successfully from their ewallet application.


  1. Additional recheck status handling

  • Recheck status for previous DuitNowQR in same sales
    • Xilnex Retail POS implemented a process to recheck previous DuitNowQR payment status when cashiers generated a new DuitNowQR payment in the same sales.
    • This is to prevent scenario where customers already scan first generated QR and make payment successful.
    • Xilnex POS will verify the received amount for the previous QR before completing sales. When the amount is not tally with existing sales, Xilnex POS will stop complete and continue to generate new DuitNowQR.

Additional note

Do's:

  1. Ensure Active Network Connectivity
    1. Stable connectivity ensures real-time communication with the payment gateway and accurate transaction status updates.
  2. Validate Payment Status Before Force Complete the Bill
    1. Ensure that customers provide the payment status screenshot correctly to prevent reconciliation issues.

Don'ts:

  1. Do Not Close The Processing Screen When Payment In Progress
    1. Make sure the payment processing screen is active and remain open when the payment is in progress.
    2. Only close the processing screen when the payment is not valid.
  2. Do Not Force Complete When Payment Status Is Unconfirm
    1. Try not to force complete the payment when the payment status is unsure.
    • Related Articles

    • How to Disable Cash Payment in POS

      E-wallet growth E-wallet payments are now a primary way customers pay, and many merchants are intentionally moving away from cash to match this shift. In many markets, e-wallet usage has moved from niche to mainstream, with a majority of consumers ...
    • Bank Type Selection for POS Payment

      Overview This enhancement allows administrators to configure a predefined list of bank types in the Xilnex Portal. The configured bank list will be available in POS and F&B POS, enabling cashiers to select the appropriate bank when processing ...
    • How to Create a New Client in Classic POS

      Overview This function is created to centralize and manage client information in ClassicPOS. The Client Form allows users to create, update, and maintain customer records, supporting the management of personal information, transaction history, ...
    • Xilnex Classic BIR Discount Guidelines (Philippines)

      1. Overview The BIR Discount feature supports statutory discounts for eligible customers in the Philippines. This feature is currently: Available only for Philippines companies Supported only in the F&B POS for now Configured through Xilnex Classic ...
    • Setting Up Credit Card Terminal in Xilnex ClassicPOS

      Introduction This guide explains how to configure and integrate credit card terminals with the POS system. The integration ensures smooth communication between the POS and payment devices, helping businesses process transactions securely and ...
    • Recent Articles

    • Managing Lark User Email Mapping in Xilnex for Lark

      Overview The Users card matches each Xilnex user to their Lark account by email. This is what lets features like Permission Approvals and Document Approvals deliver Lark cards to the right person. This article covers how to review the mapping and fix ...
    • E-Wallet and Credit Card Payment - Recheck Status & Force Complete

      This guide walks you through what to do when a payment goes through on the terminal or e-wallet, but Classic POS fails to commit sales. When Does This Happen? During payment, Classic POS will show a "Connecting to Ewallet party..." or processing ...
    • E-Journal for BIR Compliance (Philippines)

      Overview The E-Journal feature generates a .txt file that complies with BIR (Bureau of Internal Revenue) requirements in the Philippines. This feature is available only for the Philippines COM. Users from other countries' COMs will not be able to ...
    • Disconnecting or Reconnecting Xilnex for Lark

      This article covers how to disable a template, fully disconnect the integration from Lark, and reconnect it again. Disable a Template Turning a base off only stops that one base, everything else keeps syncing, and none of your existing data in Lark ...
    • Creating a Base in Xilnex for Lark

      Overview This article walks you through creating a base for a template, giving end users access to it in Lark, and verifying data is syncing correctly. Xilnex for Lark must already be connected before you start. If the Templates card isn't accessible ...
    • Popular Articles

    • Basic - How to create a voucher-coupon

      Voucher and coupon definition Voucher can be generated in bulk and can be used once Coupon can only be created one at a time (reusable code) and can be use multiple times Pre-voucher / coupon setup There are 2 things need to be prepared before we can ...
    • Understanding DuitNow QR Payment in ClassicPOS

      Introduction This document introduces the DuitNow QR payment feature available in the Xilnex Retail POS, enabling merchants to accept payments conveniently through Malaysia's national QR payment standard. The integration of DuitNowQR simplifies the ...
    • Intermediate - How to Configure and Use Approval Settings in Purchase Orders (PO)

      1.0 What is approval setting In general, "approval setting" refers to the configuration or process by which a request, action, or change must be reviewed and approved before it proceeds. The term is often used in business, software applications, and ...
    • Buy 2 for Special Price Promotion

      Use Case: Stock clearance, seasonal offers, or spotlight products. From the sample screenshot above, this promotion requires 2 items to trigger. If only 1 Milk Tea is added to the sales list, no discount will apply since the condition of 2 items is ...
    • Creating Delivery Type for Sales in Classic POS

      How to Create Delivery Type 1. Access to the [System Configuration] 2. Select the [Sales] section 3. In the [All Outlets] tab, look for the 'Delivery Type' 4. Click on the [Configure] In the Delivery Type Setup form: 1. Enter the Delivery Type. 2. ...