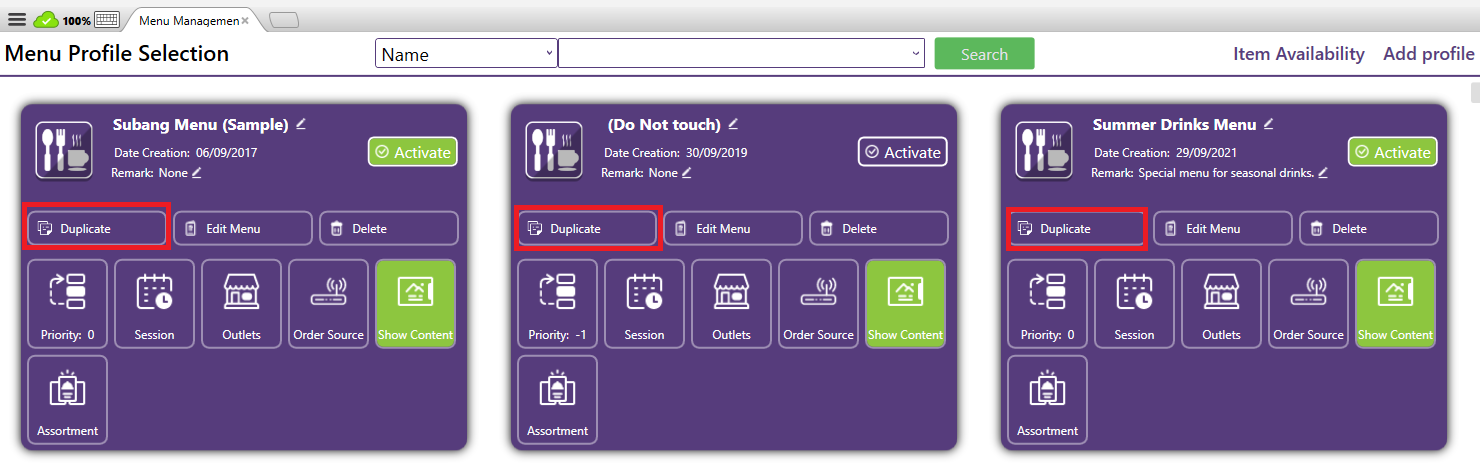
How to Duplicate a Menu Profile?
The Duplicate Profile function allows users to quickly create a new menu profile by copying an existing one. This is especially useful when multiple outlets or locations share similar menus but require slight adjustments (e.g., pricing, item availability, or session timing).
Key Benefits:
- Saves time by reusing existing menu structures.
- Reduces setup errors by ensuring consistency across profiles.
- Allows quick adaptation for new outlets, campaigns, or menu variations.
When perform menu duplication, the following fields are available:
- Duplicate From
- The menu profile name selected from the existing menu profile that will serve as the source. All items, modifiers, session setups, and configurations from this profile will be copied into the new profile.
- New Profile Name
- Enter the name for the duplicated profile. This ensures it is clearly distinguishable from the original, making it easy to identify and manage.
- Location / Duplicate Location
- Location drop down list will define the outlet(s) where the new profile will apply.
- Duplicate Location selection allows the duplicated profile to be aligned with the profile that duplicated form. When enabled, the Location drop down list will be uneditable.
- Remark
- Add notes or context for the duplicated profile (e.g., “Created for new outlet opening” or “Test version for seasonal menu”). Remarks help maintain clarity when managing multiple profiles.
- Create / Cancel
- Press Create to proceed to creation of the duplicated menu.
- Press Cancel to revert the process and back to the menu management module.
Related Articles
What is Menu Management in Xilnex Classic POS?
What is Menu Management in Xilnex Classic POS? The Menu Management function provides a centralized and flexible platform to design, organize, and maintain your product catalog across all sales channels. It is built to streamline menu setup, ensure ...How to Add a Menu Profile?
A Menu Profile refers to a specific set or version of a restaurant’s menu that is designed for a particular outlet, channel, or time period. It helps restaurants organize and control which food and drink items are available, where they appear, and ...How to Delete a Menu Profile?
The Delete Menu button will permanently remove the selected menu profile from the system. A menu profile typically contains menu items, modifiers, outlet and order source controls, and session configurations. Key Notes: Once deleted, the profile and ...How to Edit a Menu Profile?
The Edit Menu Profile function allows you to modify the existing settings, items, or configurations within a specific menu profile. It’s used when you need to update what items are available, or change the profile’s details Add: Add menu item by ...What is Menu Priority Level?
The Priority Level setting in Menu Management is used to determine which menu should take precedence when multiple menus are available in the same location. Since a single outlet may have different menus (e.g: Seasonal menu, Breakfast menu, ...
Recent Articles
Managing Lark User Email Mapping in Xilnex for Lark
Overview The Users card matches each Xilnex user to their Lark account by email. This is what lets features like Permission Approvals and Document Approvals deliver Lark cards to the right person. This article covers how to review the mapping and fix ...E-Wallet and Credit Card Payment - Recheck Status & Force Complete
This guide walks you through what to do when a payment goes through on the terminal or e-wallet, but Classic POS fails to commit sales. When Does This Happen? During payment, Classic POS will show a "Connecting to Ewallet party..." or processing ...E-Journal for BIR Compliance (Philippines)
Overview The E-Journal feature generates a .txt file that complies with BIR (Bureau of Internal Revenue) requirements in the Philippines. This feature is available only for the Philippines COM. Users from other countries' COMs will not be able to ...Disconnecting or Reconnecting Xilnex for Lark
This article covers how to disable a template, fully disconnect the integration from Lark, and reconnect it again. Disable a Template Turning a base off only stops that one base, everything else keeps syncing, and none of your existing data in Lark ...Creating a Base in Xilnex for Lark
Overview This article walks you through creating a base for a template, giving end users access to it in Lark, and verifying data is syncing correctly. Xilnex for Lark must already be connected before you start. If the Templates card isn't accessible ...
Popular Articles
Basic - How to create a voucher-coupon
Voucher and coupon definition Voucher can be generated in bulk and can be used once Coupon can only be created one at a time (reusable code) and can be use multiple times Pre-voucher / coupon setup There are 2 things need to be prepared before we can ...Understanding DuitNow QR Payment in ClassicPOS
Introduction This document introduces the DuitNow QR payment feature available in the Xilnex Retail POS, enabling merchants to accept payments conveniently through Malaysia's national QR payment standard. The integration of DuitNowQR simplifies the ...Intermediate - How to Configure and Use Approval Settings in Purchase Orders (PO)
1.0 What is approval setting In general, "approval setting" refers to the configuration or process by which a request, action, or change must be reviewed and approved before it proceeds. The term is often used in business, software applications, and ...Buy 2 for Special Price Promotion
Use Case: Stock clearance, seasonal offers, or spotlight products. From the sample screenshot above, this promotion requires 2 items to trigger. If only 1 Milk Tea is added to the sales list, no discount will apply since the condition of 2 items is ...Creating Delivery Type for Sales in Classic POS
How to Create Delivery Type 1. Access to the [System Configuration] 2. Select the [Sales] section 3. In the [All Outlets] tab, look for the 'Delivery Type' 4. Click on the [Configure] In the Delivery Type Setup form: 1. Enter the Delivery Type. 2. ...