Configure A Host KDS Device

Configure A Host KDS Device

A Host KDS in Xilnex KDS 2.0 is the designated central hub device responsible for synchronizing and managing the entire kitchen network. It acts as the primary authority, ensuring that all orders from the POS system are correctly distributed to connected Client KDS devices in real-time.

The key functions of the Host KDS include:
  1. Central synchronization: It processes incoming orders and pushes updates to all other connected screens (Client KDS).
  2. Network management: It performs system health checks and maintains stable connections within the local network.
  3. Order authority: It tracks the status of every order (e.g., new, cooking, ready) and ensures all stations show consistent, up-to-date information.
  4. Operational stability: Because it manages the network state, the Host KDS must remain powered on and connected at all times to prevent system-wide disruptions.
In short, while Client KDS devices focus on displaying and bumping orders for specific stations (like Grill or Bar), the Host KDS works in the background to keep the whole system talking to each other.

Configure A Host KDS Device

1. Upon running the app after installation, the KDS will automatically perform a system health check. Click "Continue" to proceed to the next page.

2. Select Host mode for first time setup.

3. The system will be checking the license key activation; If this is the first-time setup, a license key will be required.
Get your license key here and by selecting the app 'KDS'.

4. Insert a name for the host device.
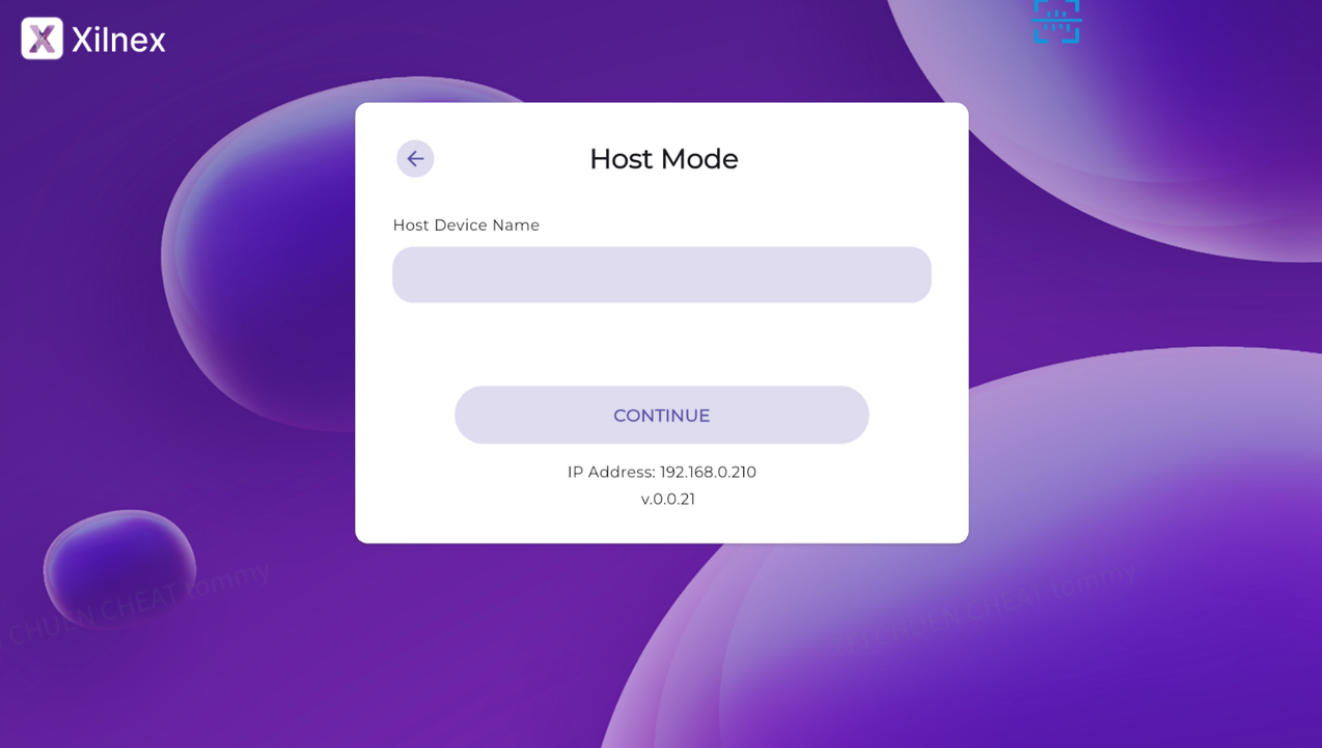
5. Select KDS Profile & Customer Display Profile (if applicable).
Info
Learn how to configure a KDS Profile and Customer Display Profile

    • Related Articles

    • KDS Customer Display Profile

      Customer Display Profile Customer Display Profile in Xilnex KDS 2.0 is specifically designed for the monitor facing customers during food preparation and readiness for pickup. It shows real-time order status and queue information, keeping customers ...
    • Congiure a Client KDS - Connect to a Host KDS

      KDS Client A KDS Client Device in Xilnex KDS 2.0 is a display screen (such as a tablet, monitor, or smart TV) located at a specific kitchen station (e.g., Grill, Bar, or Cold Station). Its primary function is to receive and display orders sent from ...
    • Connecting KDS 2.0 to POS

      Xilnex ClassicPOS Important Notice: As of now, in order to use KDS2.0, Classic POS version must be at least version 2.16 July 2025 and above. 1. In System Configuration > select Device Configuration > under This Machine > look for Kitchen Display ...
    • Introducing Xilnex KDS 2.0

      Xilnex KDS 2.0 is an advanced Kitchen Display System designed to help restaurants and kitchens stay organized and efficient. Built with the latest technology, it supports Android tablets, iPads, Windows PCs, and even smart TVs with web browsers. You ...
    • KDS Profile - Stage and Bump Stage Configuration

      Stage Configuration Stage Configuration defines when a KDS receives an order. For example, a Prep Station may only receive items after the Host KDS bumps them to the ‘Start’ stage.” There are 5 stages to configure: Order (Compulsory) Start (Optional) ...
    • Recent Articles

    • Xilnex for Lark — Closed Beta is Live!

      Xilnex for Lark has officially been released on Xilnex Portal v0.0390.0826. The closed beta is now live for the closed beta registered companies How to Access Xilnex for Lark on Portal Step 1 — Find the Plugin section Click the ⋮ (three-dot menu) at ...
    • How to import item in Xilnex Classic and Xilnex Portal?

      KB: Item Import Guide (Classic + Portal) 1. Overview & Purpose Item Import lets you create and update item master data in bulk from a CSV file, instead of keying items in one by one. The function exists in two places — Classic and Portal — and both ...
    • Transfer Note Lifecycle info

      Transfer Note Lifecycle What Is This Concept? A Transfer Note (TN) is the document that records stock moving from one location to another — HQ to outlet, outlet to outlet, or inter-company. It is not a single event but a state machine spanning two ...
    • Basic - How to Create a New Item Code

      How to Create a New Item Code An Item Code is the master record for every product you sell or stock in Xilnex. Creating a complete item record ensures accurate sales, purchasing, inventory tracking, and reporting across all your locations. The system ...
    • Portal: Store Ordering User Setup Guide

      User Guide For Order Processing Covers twelve screens across four areas: Area Screens Primary audience Order & item setup · Part 2 · Part 3 Order Type Maintenance · Item Allowed by Order Type · Item Availability · Store Availability HQ / System Admin ...
    • Popular Articles

    • Basic - How to create a voucher-coupon

      Voucher and coupon definition Voucher can be generated in bulk and can be used once Coupon can only be created one at a time (reusable code) and can be use multiple times Pre-voucher / coupon setup There are 2 things need to be prepared before we can ...
    • Understanding DuitNow QR Payment in ClassicPOS

      Introduction This document introduces the DuitNow QR payment feature available in the Xilnex Retail POS, enabling merchants to accept payments conveniently through Malaysia's national QR payment standard. The integration of DuitNowQR simplifies the ...
    • Intermediate - How to Configure and Use Approval Settings in Purchase Orders (PO)

      1.0 What is approval setting In general, "approval setting" refers to the configuration or process by which a request, action, or change must be reviewed and approved before it proceeds. The term is often used in business, software applications, and ...
    • Buy 2 for Special Price Promotion

      Use Case: Stock clearance, seasonal offers, or spotlight products. From the sample screenshot above, this promotion requires 2 items to trigger. If only 1 Milk Tea is added to the sales list, no discount will apply since the condition of 2 items is ...
    • Creating Delivery Type for Sales in Classic POS

      How to Create Delivery Type 1. Access to the [System Configuration] 2. Select the [Sales] section 3. In the [All Outlets] tab, look for the 'Delivery Type' 4. Click on the [Configure] In the Delivery Type Setup form: 1. Enter the Delivery Type. 2. ...