How to Create Goods Receive Note
Description
A Goods Receive Note (GRN) is used to record inventory received from a supplier into your outlet. After completing a Purchase Order (PO), you confirm and close it by creating the corresponding GRN — this moves the received items automatically into your inventory stock. When creating a GRN, you can record the supplier invoice details, add received items either by barcode scan, item lookup, or PO reference, and enter the quantity and unit cost for each item. The system also supports a distribution function that lets you allocate received stock to multiple outlets in a single transaction — the system will automatically generate the corresponding Transfer Notes for each outlet. Once confirmed, the GRN updates your stock levels and cannot be amended.
Steps
Step 1 — Navigate to Goods Receive Note
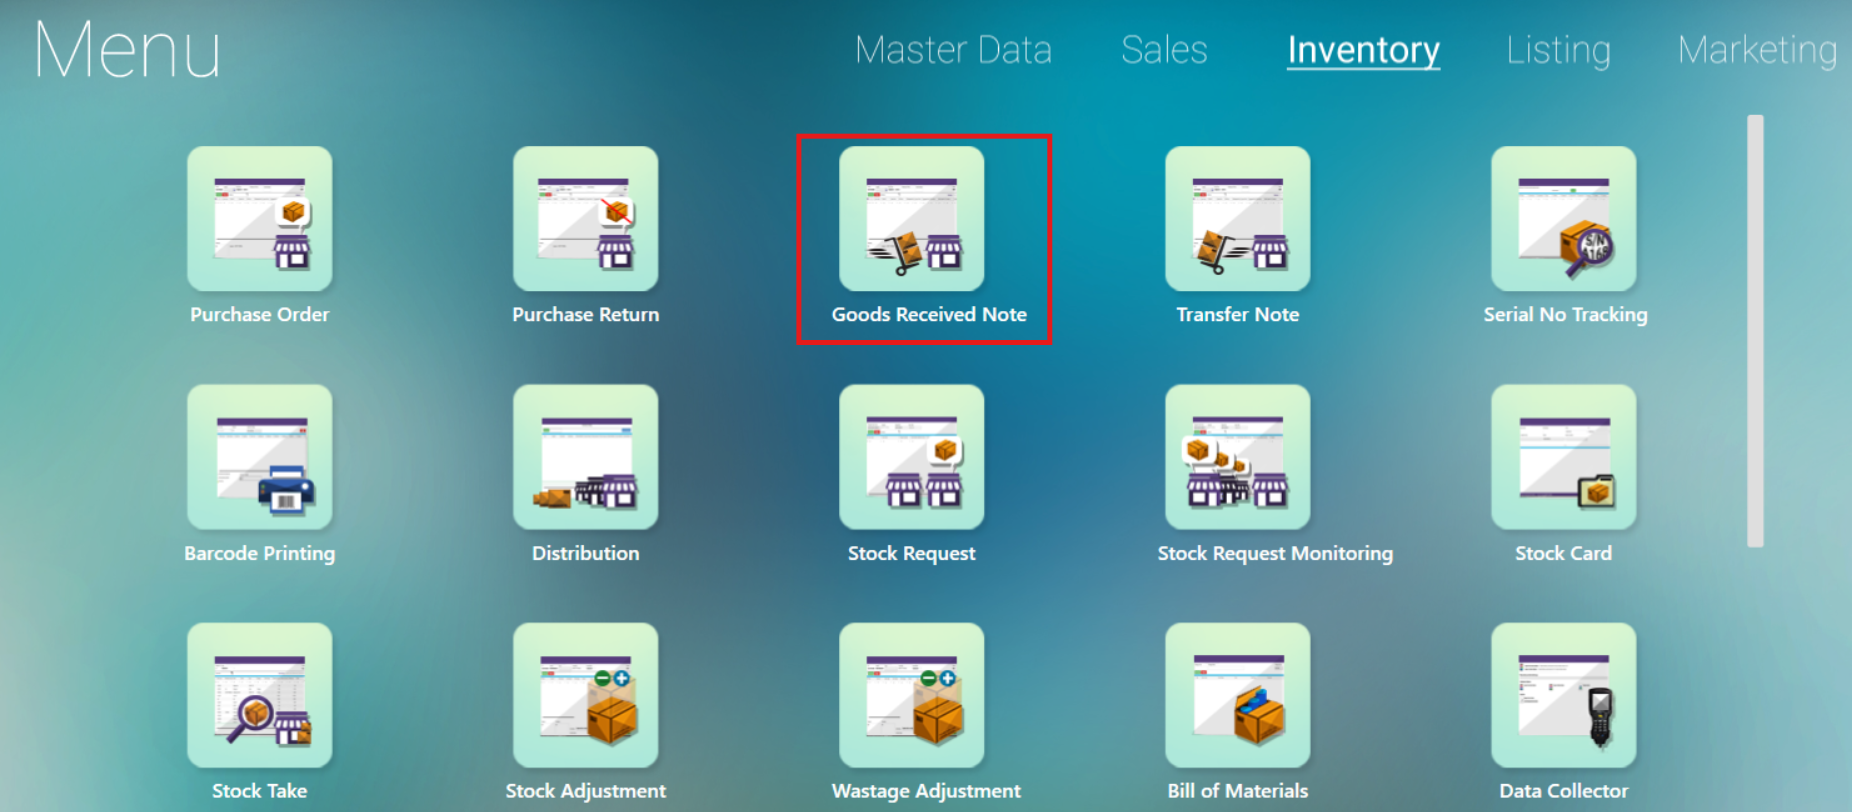
- From the top navigation bar, click Inventory.
- On the Inventory module screen, click the Goods Receive Note tile.
The Goods Receive Note tile shows a warehouse/delivery icon. It sits in the top-left area of the Inventory module alongside Transfer Note and other inventory functions.
Step 2 — Open a New GRN
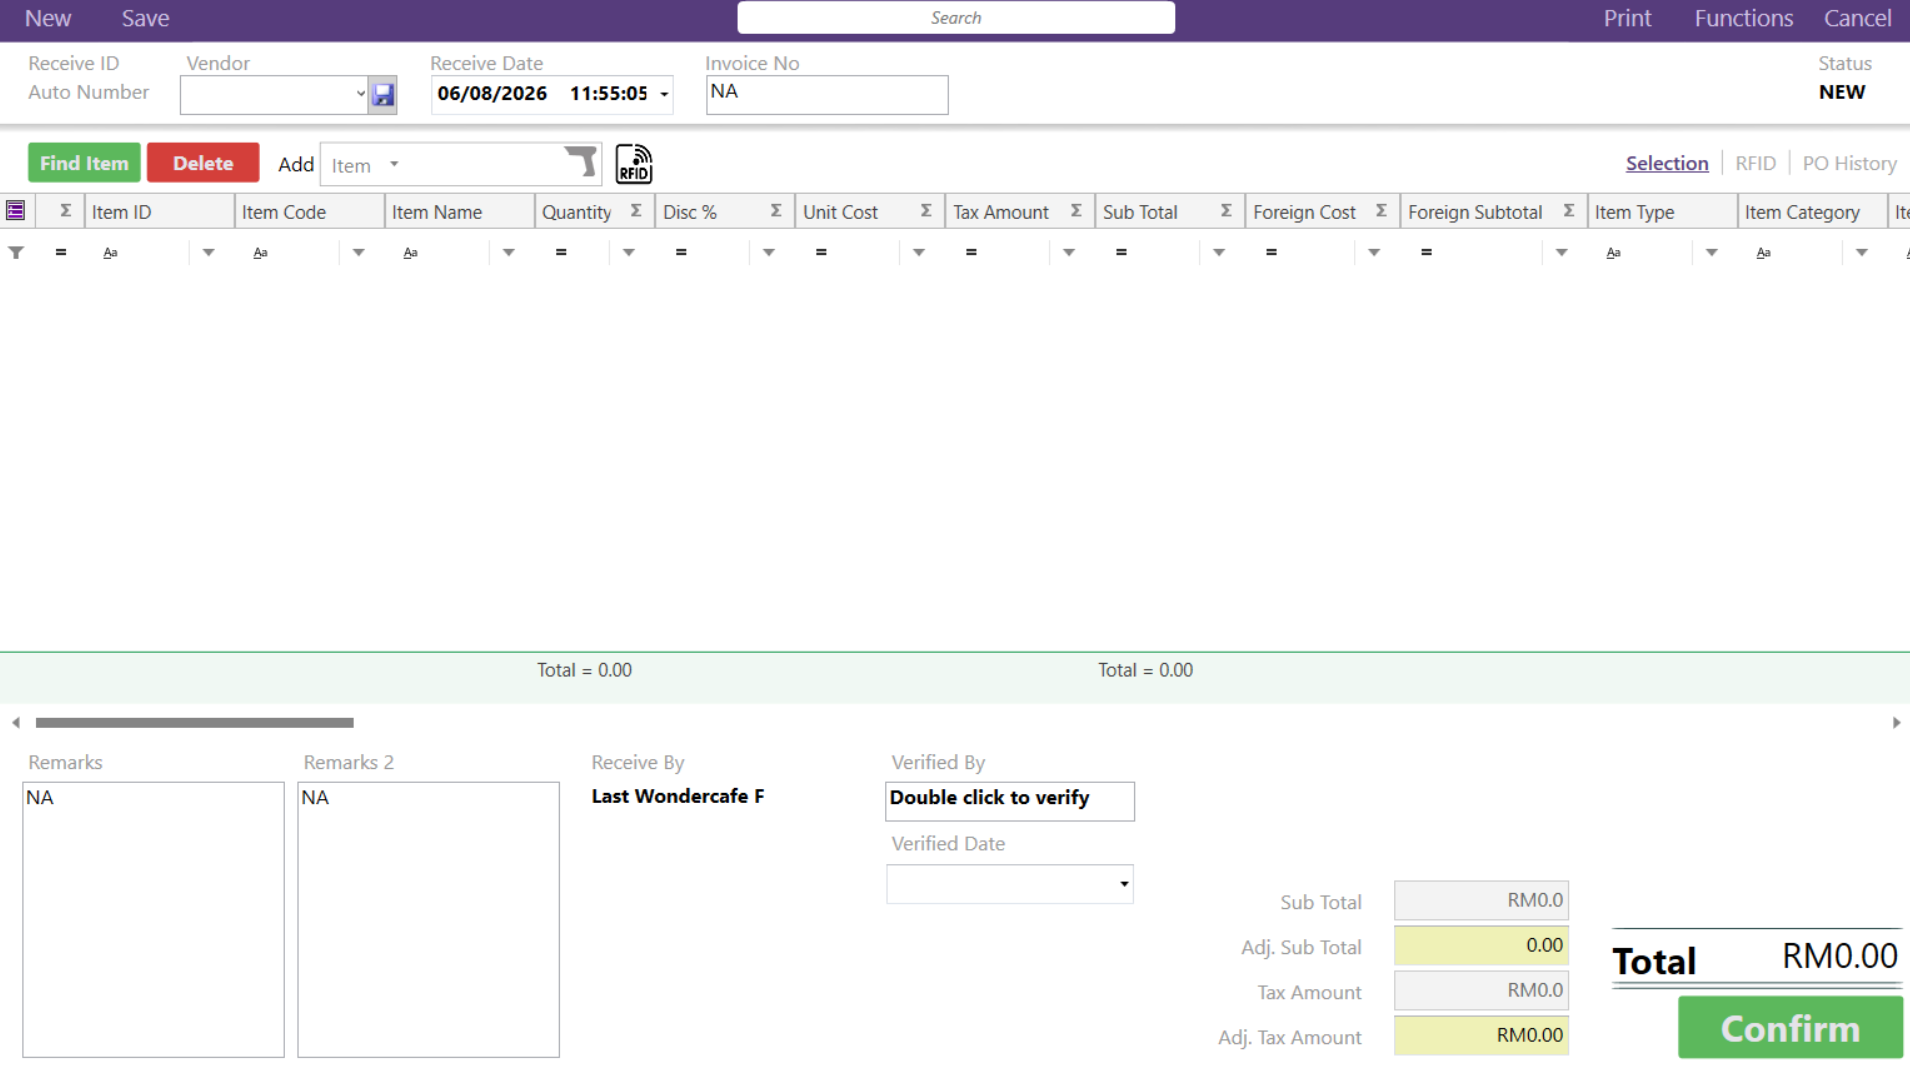
- On the Goods Receive Note list screen, click New in the top toolbar to create a new record.
The system opens the GRN form. A Receive ID is assigned automatically (shown as "Auto Number"). The Status is set to NEW. The current date and time are pre-filled in the Receive Date field.
Step 3 — Select the Supplier (Vendor)
- Click the Vendor dropdown and select the supplier you are receiving goods from.
After selecting a vendor, the Terms Remark field (e.g. "Pay within 7 days") may be auto-populated based on the supplier's configured payment terms.
Step 4 — Enter the Supplier Invoice Number
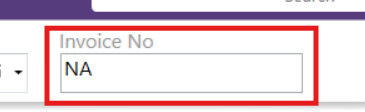
- In the Invoice No field, type the supplier's invoice number as it appears on the physical invoice or delivery order.
Step 5 — Fill In Additional Header Information (Optional)
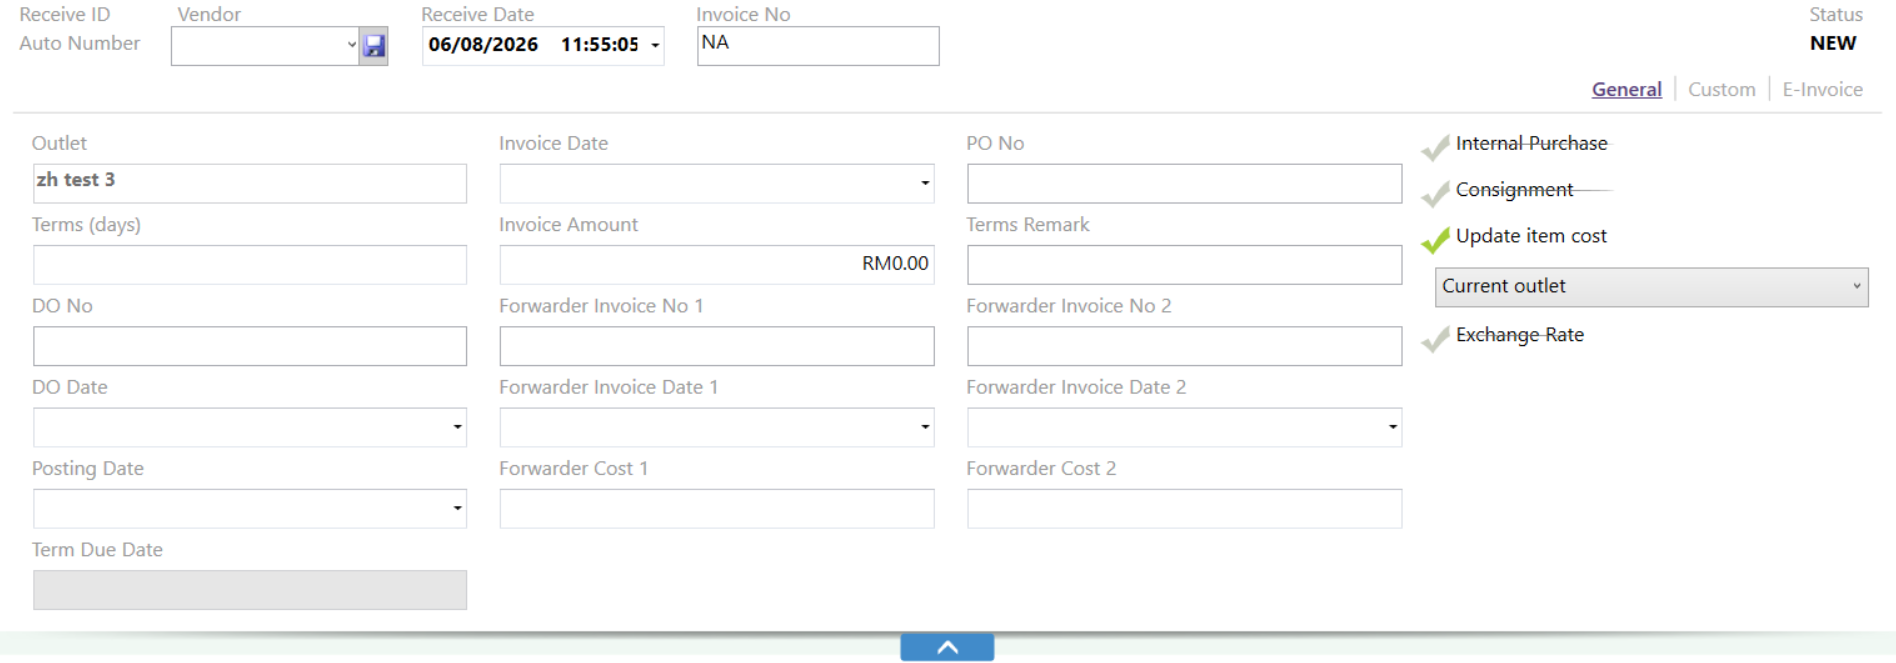
- To enter optional delivery details, click on the blank white space in the additional fields area below the main header. The following fields are available:
- PO No — the Purchase Order number linked to this delivery
- DO No — the Delivery Order number from the supplier
- Invoice Date — the date shown on the supplier's invoice
- DO Date — the date of the supplier's delivery order
- Terms (days) — payment terms in days (e.g. 30)
- Outlet — the receiving outlet (defaults to your current outlet, e.g. "HQ")
These fields are optional. Fill them in based on your management's requirements for tracking supplier documentation. The right-hand panel also shows toggles for Internal Purchase, Custom In-Store Location, and Update Item Cost — review these settings before adding items.
Step 6 — Add Items to the GRN
You have two methods to add items. Use either or both within the same GRN.
Method A — Add by Item Code or Purchase Order (Scan / Type)
- In the Add dropdown next to the item entry bar, click the arrow to choose the input type:
- Select Item if no PO was created for this delivery. You will add items manually by scanning or typing the barcode / item code, or by selecting from a list.
- Select PO if a Purchase Order was raised before receiving. Enter the PO ID and all items from that PO will populate automatically. After the items load, check the list and confirm that the total physical quantity received matches the quantity stated in the GRN.
- Type or scan the barcode / item code, or enter the PO ID, into the input field and press Enter.
The Add dropdown (with options Item and PO) is located in the toolbar above the item grid, next to the Delete button. Choosing PO pulls in all items from that purchase order automatically.
Method B — Add by Find Item
- Click the green Find Item button in the toolbar above the item grid.
- A search panel or popup will appear. Search for the item by name or code, then select it to add it to the GRN line.
Find Item is the recommended method if you do not have a barcode scanner or do not know the exact item code.
Step 7 — Enter Quantity and Unit Cost
- Once an item appears in the item grid, click on the Quantity (UC) cell for that item row. A yellow-highlighted input cell will activate.
- Type the quantity of units received.
- Click on the Unit Cost cell and enter the cost per unit as stated on the supplier invoice.
The Sub Total column calculates automatically (Quantity x Unit Cost). The Total summary at the bottom of the form also updates in real time.
Alternatively, if a Quantity Editor popup appears after adding an item, fill in the following fields and click OK:
- Quantity — number of units received
- Cost — cost per unit
- FOC Quantity — free-of-charge units (enter 0 if none)
The Quantity Editor popup also shows the All Outlet total Qty and Current Outlet Qty for reference, so you can see existing stock levels before confirming the receipt.
Tax Code (GST %): Each item line includes a Tax % column that is automatically populated from the item's configured Tax Code (Purchase) in Master Data. You do not need to set this manually for standard stock items.
Step 8 — Add More Items (If Needed)
- Repeat Steps 6 and 7 for each additional item being received in this delivery. Each item will appear as a new row in the item grid.
Step 9 — Fill In Remarks (Optional)
- In the Remarks text box at the bottom-left of the form, type any internal reference notes or remarks relevant to this GRN (e.g. partial delivery, condition notes).
The Receive By field next to Remarks is auto-filled with the logged-in user's name.
Step 10 — Save the GRN (Optional Before Confirming)
- Click Save in the top toolbar to save the GRN in Saved status without confirming it yet.
A GRN in Saved status can still be edited. Use Save if you need to pause and return to the record later, or if you want a supervisor to review before confirming.
Step 11 — Confirm the GRN
- Once all items, quantities, and costs have been verified, click the green Confirm button at the bottom-right of the form.
Important: Once you click Confirm, the GRN status changes and the transaction can no longer be amended. Stock levels are updated immediately upon confirmation. Make sure all details are correct before clicking Confirm.
Using Find Item to Add Multiple Items at Once
When you click Find Item, the system opens an item selection screen. This screen allows you to:
- Select multiple items at once using the Select checkboxes on the left.
- Enter the Input Qty (quantity to receive) and Input Cost/Price for each selected item directly in the grid.
- Filter or search by Item Code or Item Name using the column headers.
Once all desired items are selected and quantities/costs are filled in:
- Click the green Add Item button at the top-left of the Find Item screen to add all selected items to the GRN at once.
- Click Cancel to close the screen without adding items.
Each selected row is highlighted in yellow. Items with a checked Select box and a valid Input Qty will be added to the GRN line items upon clicking Add Item.
Tax Code on GRN Lines
Each item line on a GRN carries a Tax Code (GST %) that is inherited automatically from the item's Tax Code (Purchase) setting in Master Data. The system calculates the tax amount after save — you do not enter it manually for standard stock items.
When the GRN total does not match the supplier invoice
If there is a discrepancy between your GRN total and the supplier's physical invoice — either in the Tax Amount or the Total Amount — use a Service-Based item code to absorb the difference. The service item must have its Tax Code (Supply) and Tax Code (Purchase) configured under Additional Information in Master Data.
Summary
| Step | Action |
|---|---|
| 1 | Go to Inventory > Goods Receive Note |
| 2 | Click New to create a new GRN |
| 3 | Select the Vendor (supplier) |
| 4 | Enter the Invoice No |
| 5 | Fill in optional fields: PO No, DO No, Invoice Date, DO Date |
| 6 | Add items via scan/type (Item or PO) or via Find Item |
| 7 | Enter Quantity and Unit Cost for each item |
| 8 | Add a Remark if needed |
| 9 | Click Save to save as draft, or Confirm to finalise |
Once Confirmed, the GRN cannot be edited. If you need to make corrections, do so while the record is still in Saved status
FAQ
Answer: The Purchase Order List is meant to show all the purchase order by document level, the Received Quantity only can be trace from "Po List (By Item)". In the PO List (By Item), each purchased item will contain column "Purchased Quantity", "Received Quantity" and "Unreceived Quantity".
Example:
2a. Enable the configuration as "Enforce vendor invoice entry" from System Configuration > Item > All Outlets > Item Enforcement. This configuration will enforce the users to update the Invoice No in Goods receive note.
- From the sample, the UOM name as "Pair" and the UOM Factor is 2, when the quantity of the UOM Item is added by 5 quantity, Xilnex will auto do the conversion and convert it to 10 quantity.